MIXER MODE: THE SOUNDCRAFT MIXER
BRIEF INTRODUCTION
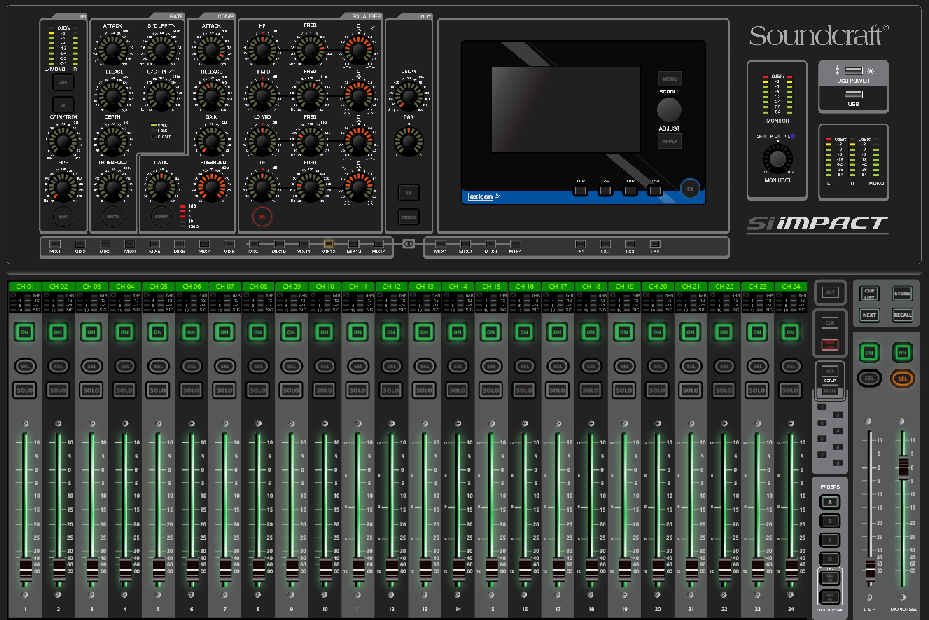
To view the Soundcraft Si manual, click on the LCD screen in the image above, or select the following link.SOUNDCRAFT Si IMPACT
It would be impossible for write a step by step guide in sound mixing, every event is different, every audio engineer mixes differently. There is no real "right way," but there are many wrong ways. I urge you to read the Soundcraft manual, and to also invest a great deal of time in practicing with the different setups. The manual and training videos are located in the Information and Downloads section on this tutorial.
Analog & Digital Workflow Differences
Traditional Analog Mixer |
Digital Mixer Differences |
Connecting Inputs |
| Inputs are connected to the back of the board and correspond directly with channels. |
Inputs on the back of the board may correspond with faders but may need to be assigned. Additional inputs via Ethernet stage boxes may also need to be assigned to faders. |
Adjusting Channel Settings |
| Dedicated controls on each channel strip allow you to quickly dial in mic gain, EQ, and other settings, while providing a summary of channel settings at a glance. |
Select buttons on each channel allow you to use a single master section to dial in gain, EQ, dynamics, and additional settings. |
Setting Up Sends |
| Individual send knobs on each channel let you quickly dial in additional mixes. Sends typically have master volumes and pre-/post-fader assignment buttons. |
Sends may be set up from the master section by setting the channel layout to send mode or by another method. Outputs are often freely assignable in the master control section, allowing you to pair physical outputs with send or group buses. |
Setting Up Groups |
| VCA groups are usually assigned via small buttons along the fader or elsewhere on the channel. The number of groups is always limited by the circuitry. |
While some digital mixers handle groups similar to the way analog mixers do, group assignments are typically much more fluid and far less limited. With layered banks of faders, groups may live on their own layer for easy access during live mixing. |
Accessing Effects and Processing |
| Typically, analog mixing consoles don't have effects or master bus processing onboard. When they do have effects, they're usually assigned to one of the auxiliary send buses. Other channel and bus processing is usually available via insert points. |
Most digital mixers include extensive effects and processing, minimizing the need for a rack full of outboard gear and effects processors. The tradeoff is that if you want to use outboard gear, you'll probably need to route signal through an assignable send. |
Mute Button
First thing you will notice on a digital mixer is that there is no Mute button. The mute button is one of the most basic functions of an audio console. When the mute button is engaged the track is not audible (or muted). If the button is disengaged, the track is on and audible. If you don’t see a ‘mute’ button on your console, you may simply have a track on/off button or switch. When the track is in the ‘on’ position, the channel is essentially unmuted, and when the track is in the ‘off’ position, the channel is essentially muted.
- Turn everything down or off before plugging new devices into the mixer.
It’s hard to know where every level is set if you don’t start them at zero. Lower everything to the lowest setting, plug-in every device you’ll use, then slowly adjust the faders and other components to achieve the desired results.
- Set group adjustments for each channel.
You can bunch several adjustments, making it reusable for additional channels. For example, you can set the same list of modifications for Group A, then copy-paste it to Group B to have the same effect. It takes a little while to create the first group, but it changes instantly afterward.
- Change inputs to different channel groups.
Once you’ve plugged everything into the mixer, you can set a channel for every input or group them together, as you read above. This customization streamlines the process by making each channel follow a dedicated line, which can be bunched together.
- Cycle through the pages to view meters, sets, and more.
Most digital mixers have several tabs you can look through to change all of the settings. Check your meters to ensure you’re not blowing out the speakers or going out of the desired range. You can also review the groups you created and adjust them digitally.
- Assign new effects to each part of the digital mixer.
Perhaps one of the best features of digital mixers is you can make a new effect or sound correspond with several knobs and buttons. You don’t have to stick with the default setup. It’s an excellent way to change between podcast episodes, performances, and more.
The below images are from selected pages within the Soundcraft manual, to view the full manual, select the link which will open the manual on a seperate page.SOUNDCRAFT Si IMPACT MANUAL
MIXER MODE: SOUNDCRAFT MIXER